How to register a PowerSchool parent account
IMSA parents, this describes how you can open a login account with our IMSA PowerSchool system. (Where this says just “parent” we mean parent or other legal guardian and by “student” we mean an IMSA student related to that parent/guardian.)
For making payments, see the MySchoolBucks page.
Note that you can also add a student to an existing parent account. If you already have an active IMSA PowerSchool parent account you probably want to add the new student to that account so you can login once and see information about all of your students. This does not apply if you have a PowerSchool account with some other school district.
Steps
-
Make sure you know the Access ID and Access Password information for at least one student. That information was sent in the invitation letter for the student. You can also get that information later by calling the Principal’s Office at 630-907-5053.
-
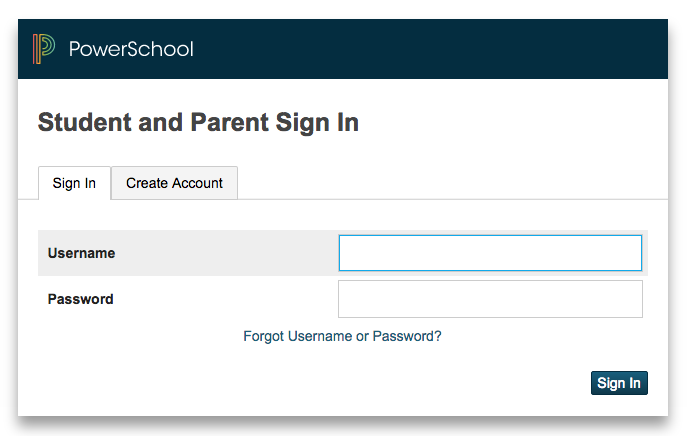
Visit https://sis.imsa.edu in a web browser.
-
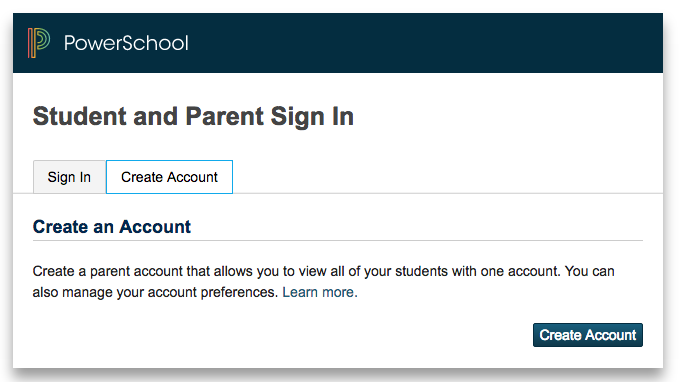
In the Student and Parent Sign In page, click the
Create Accounttab, then click theCreate Accountbutton. -
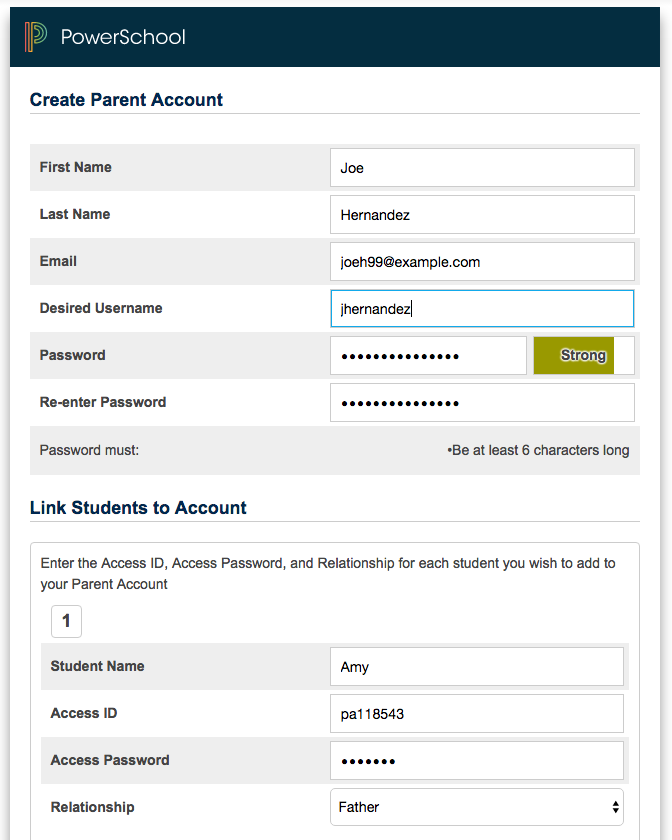
In the Create Parent Account page, enter your first name, last name, email address, and desired username into the corresponding fields. Enter your desired password, twice. You should enter this data correctly but it doesn’t have to match anything else; it’s whatever you choose.
To finish activating your account (see below) you’ll have to respond to a message sent to that email address, so please enter your email address carefully. If you later request to reset your password the message will go to the email address you give here, and to even make the request you’ll have to enter the email address again so if you have multiple email addresses please leave yourself a note about which one you used here and the corresponding username.
The username you choose here is what you will use when logging into PowerSchool from now on. If someone has already claimed that username you will be asked to choose a different one. You can change any of these five fields later on by logging in and visiting the Preferences page. You will need to remember your new username and password when you login, so please make a note of them somehow.
-
In the block labeled
1enter your student’s name. For Access ID and Access Password enter the values from the invitation letter for the student. For Relationship select the appropriate relationship type. You must complete all four of these fields.The student name you enter here is not used by the system. Instead, it finds the student based on the Access ID. The Access Password is how you prove that you should be allowed parent/guardian access for that student. The relationship type cannot be changed later so please choose carefully.
-
If you have multiple students enrolling in the same year, repeat the above process in block
2(and onward) for the other students.Each student will have a different Access ID and Access Password as appears on their invitation letter. You can also enter other students via the Preference page once you have logged into PowerSchool. You must enter at least one student to create a parent account.
-
Click the
Enterbutton at the bottom of the page.
If there are any problems the page will display again with messages about what to do. You’ll have to re-enter your desired new password and the access password for any student along with any other changes.
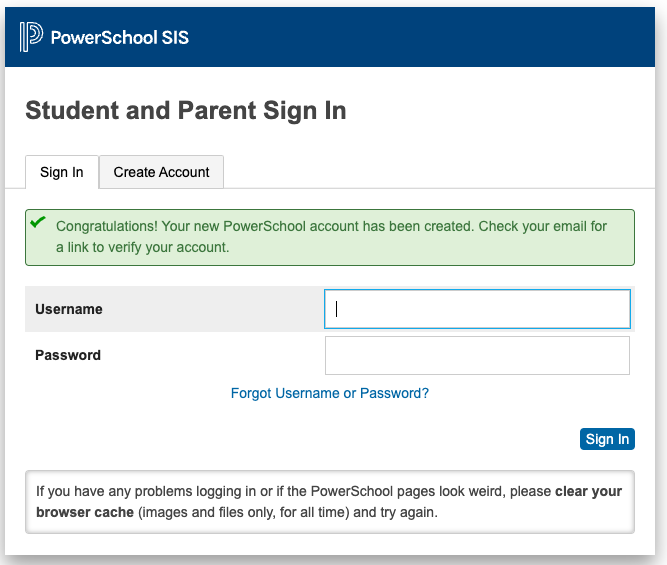
If everything is OK you’ll see the login page with a message saying that your account has been created and that you should check your email for a verification link.
Email verification
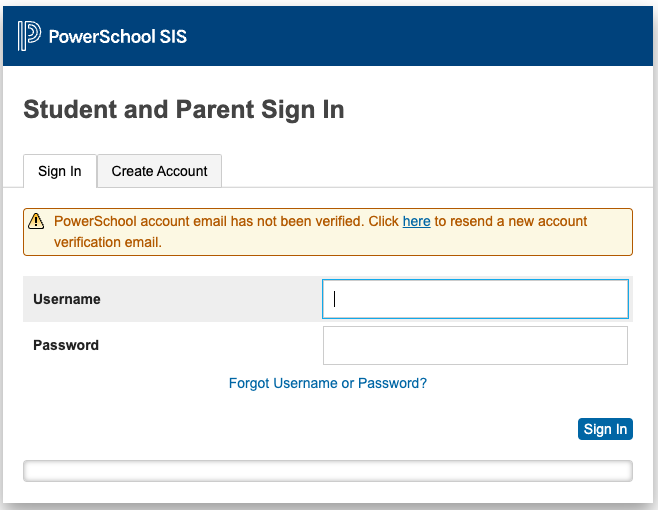
After creating an account you will not be able to login until you verify your email address. Check for a new message at your email account with a subject like “PowerSchool Account Email Verification”. If it doesn’t appear quickly, check your Spam folder too.
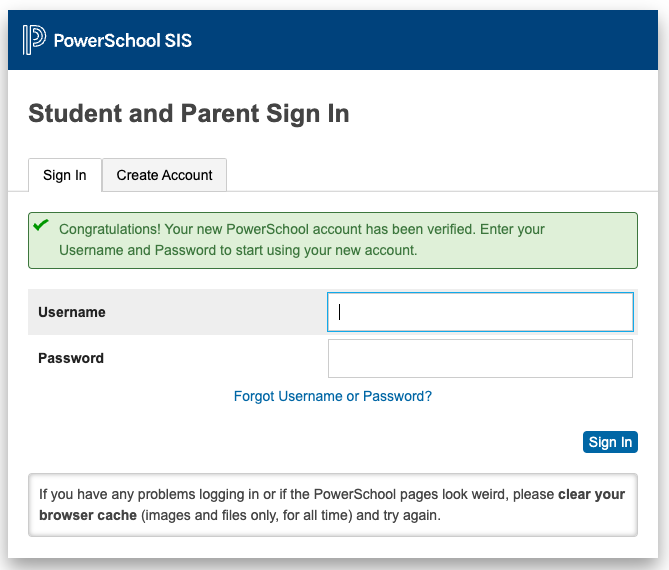
When you get the message, follow its directions and click the link that it contains. That should take you to the login page with a message saying “Congratulations! Your new PowerSchool account has been verified”
You should then be able to login to our PowerSchool system with your new username and password and view information about your students.
Problems
See the FAQ / Common Problems page for help with problems that some parents have encountered.
Screenshots
Login page
Create-account tab
Create-parent-account page
The following shows the page filled in with sample data.
Login pages
You should see this after first creating your account, before verifying your email address:
If you try to login before verifying your email address, you will get this page:
When you click the link in the verification, it should take you to this page where you can then login for the first time.: